Archive for the ‘01. FreeBSD’ Category.
FreeBSD 6.0-RELEASE下建立高速DNS缓存服务器
前阵子将服务器改成通过ipfilter+ipnat+dhcp——freebsd5.4下ipfilter+ipnat包过滤、转发和DHCP服务器架构笔记,但最近感觉服务器时常会掉线,就在服务器再开了个dns缓存服务,通过缓存希望能缓解一下目前的状况。
首先介绍在freebsd上如何建立高速dns缓存服务器,引用freebsd中文手册中的话:
缓存域名服务器是对任何域都不提供权威解析的域名服务器。 它自己简单地完成查询, 并记住这些查询以备后续使用。 要建立这样的服务器, 只需像平时一样配置一个域名服务器, 而不配置域就可以了
安装如下:
所使用的软件是BIND,安装完freebsd6.0后BIND是自动安装好的,版本为BIND9,路径一般为/etc/namedb。freebsd5.2及更早版本的用户可以通过到ISC网站上下载BIND9.3。目前, BIND 由 Internet Software Consortium http://www.isc.org/ 维护。
1、创建本地DNS反向解析域文件
proxy4bak# cd /etc/namedb
proxy4bak# sh make-localhost
在/etc/namedb/master目录下会生成localhost.rev文件。
2、编辑dns配置文件/etc/namedb/named.conf
内容如下:
options {
directory "/etc/namedb";
pid-file "/var/run/named/pid";
dump-file "/var/dump/named_dump.db";
statistics-file "/var/stats/named.stats";// forwarders {
// 221.228.255.1; 218.2.135.1;
// };
};zone "." {
type hint;
file "named.root";
};zone "0.0.127.IN-ADDR.ARPA" {
type master;
file "master/localhost.rev";
};
这里我没有用到forwarders(转发),在freebsd中文手册中有这样一段话:
要从上级的缓存中受益, 可以在此处启用 forwarders。 在一般情况下, 域名服务器会逐级地查询 Internet 来找到特定的域名服务器, 直到得到答案为止。 启用这个将让它首先查询上级域名服务器 (或另外提供的域名服务器), 从而从它们的缓存中得到结果。 如果上级域名服务器的负载很重, 在更快的域名服务器上启用它将有助于改善服务品质。
3、更改/etc/resolv.conf
将resolv.conf内容更改为:
nameserver 127.0.0.1
3、使named启动
编辑/etc/rc.conf,加入启动内容,如下:
proxy4bak# cd /etc
proxy4bak# ee rc.conf
加入
named_enable="YES"
添加完成后重启服务器,使用top命令可以查看named进程是否启动。也可以通过nslookup查询一个网址,如果可以,说明缓存已经建立了,显示如下:
proxy4bak# nslookup
> set type=any
> www.google.com
Server: 127.0.0.1
Address: 127.0.0.1#53Non-authoritative answer:
www.google.com canonical name = www.l.google.com.Authoritative answers can be found from:
google.com nameserver = ns4.google.com.
google.com nameserver = ns1.google.com.
google.com nameserver = ns2.google.com.
google.com nameserver = ns3.google.com.
在搜索相关参考资料时还发现了一个dns缓存软件——djbdns,也有朋友已经在用了。我为了方便,就直接用BIND了,因为freebsd安装时就带上了。但在性能上具体还不知道哪个会好些。
第一次建立dns缓存服务器,写的有错误之处请指出。希望这篇笔记能对想要在局域网中建立高速dns缓存服务器的朋友有用。
作者:老管 email:funpower AT gmail.com
参考文章:dns配置全文 域名系统 (DNS) – FreeBSD中文使用手册
FreeBSD5.4Release下安装维基-mediawiki-1.5.2笔记
今天利用早上一段时间,完成了mediawiki服务的安装,使用的版本为mediawiki-1.5.2,安装步骤:
1、下载以下所需软件
php-4.3.9.tar.gz
apache_1.3.33.tar.gz
mysql-4.0.21.tar.gz
mediawiki-1.5.2.tar.gz
将下载的软件通过ftp拷贝到服务器上(/home/funpower)
2、安装apache和php
# cd /home/funpower
# tar zxvf apache_1.3.33.tar.gz
# tar zxvf php-4.3.9.tar.gz
# cd apache_1.3.33
# ./configure –prefix=/usr/local/apache
# cd php-4.3.9
# ./configure –with-apache=../apache_1.3.33 –with-mysql –disable-debug –enable-track-vars
# cp php.ini-dist /usr/local/lib
# cd /usr/local/lib
# mv php.ini-dist php.ini
# cd apache_1.3.33
# ./configure –prefix=/usr/local/apache –activate-module=src/modules/php4/libphp4.a
# make
# make install
配置/usr/local/apache/conf/httpd.conf
加入:
AddType application/x-httpd-php .php
AddType application/x-httpd-php-source .phps
并修改以下几项:
Servername itnew.3322.org
DirectoryIndex index.php
将apache加入到启动项:
# ee /etc/rc.local
加入如下一行:
/usr/local/apache/bin/apachectl start
重启服务器,在/usr/local/apache/htdocs下新建一个test.php,内容为,然后输入http://yourdomain.com/test.php,如果能看到php-4.3.9的信息,则apache和php安装成功。
3、安装mysql
# cd /home/funpower
# pw groupadd mysql
# pw adduser mysql -g mysql -s /nonexitent
# tar zxvf mysql-4.0.21.tar.gz
# ./configure –prefix=/usr/local/mysql
# make
# make install
至此,mysql安装完成,下面开始具体的配置。
运行脚本
# cd scripts
# ./mysql_install_db
更改文件和目录权限
# chown -R root /usr/local/mysql
# chown -R mysql /usr/local/mysql/var
# chgrp -R mysql /usr/local/mysql
复制配置文件至/etc
# cp ../support-files/my-medium.cnf /etc/my.cnf
添加启动脚本,使mysql随系统一起启动
# echo "/usr/local/mysql/bin/mysqld_safe –user=mysql &" >> /etc/rc.local
启动mysql
# cd /usr/local/mysql/bin
# ./mysqld_safe –user=mysql &
更改mysql的root密码
# cd /usr/local/mysql/bin
# ./mysqladmin -u root password ‘123456’
拷贝mysql的libmysqlclient.so.10
# cp /usr/local/mysql/lib/mysql/* /usr/lib
# cp /usr/local/mysql/include/mysql/* /usr/include
添加wiki使用的数据库及数据库用户名
# cd /usr/local/mysql/bin
# ./mysql -u root -p
mysql> create database wikidb;
mysql> grant all on wikidb.* to wikidb@localhost identified by ‘654321’;
mysql> flush privileges;
mysql> exit
4、安装mediawiki
# cd /home/funpower
# tar zxvf mediawiki-1.5.2.tar.gz
# mkdir /usr/local/apache/htdocs/wiki
# cd mediawiki-1.5.2
# cp –R * /usr/local/apache/htdocs/wiki
在IE浏览器中输入http://127.0.0.1/wiki/,填写一些wiki安装基本参数,填写的数据库及数据库用户名就是刚才创建的数据库。填写完后点击“安装”按扭,完成安装。
完成最后几步:
# cd /usr/local/apache/htdocs/wiki/config
# cp cp LocalSettings.php ../
# cd ../
# mv config config.bak
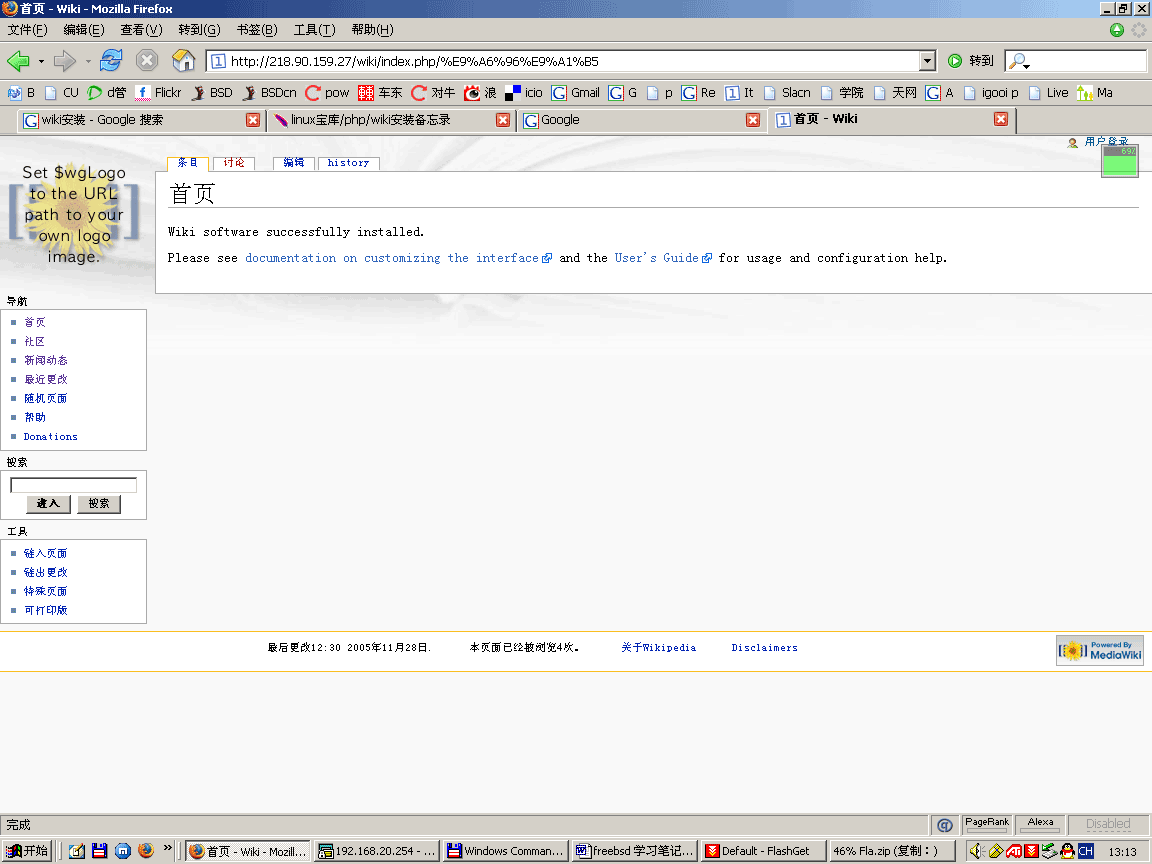
访问http://127.0.0.1/wiki/,出现首页,安装成功!
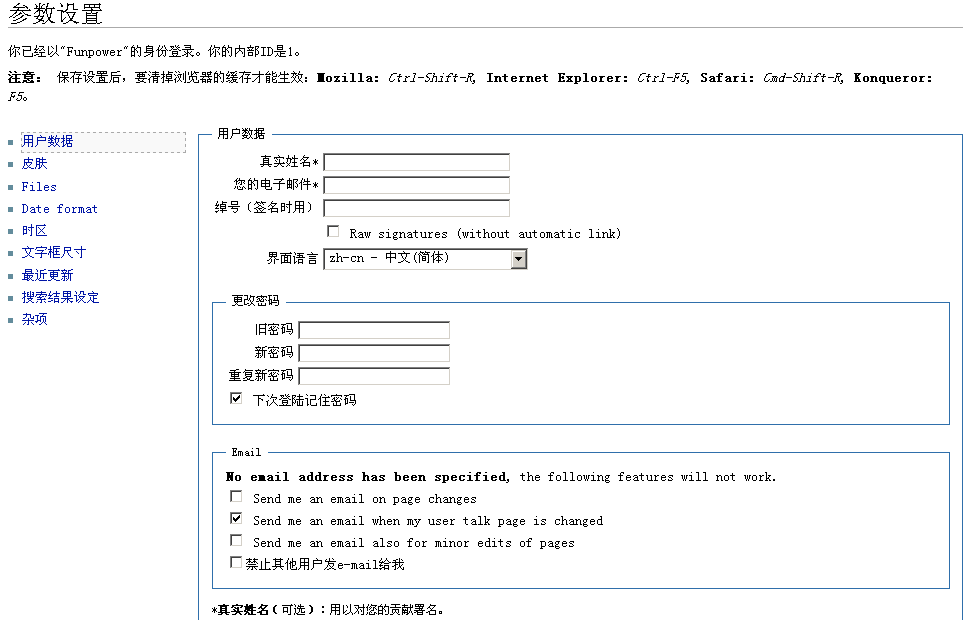
截图:
———————————————————————————–
作者:老管 email:funpower at gmail.com
参考文章:http://www.linuxmine.com/5557.html
在freebsd安装socks5服务的总结
在freebsd下,安装socks5已经很多次了(1、2),但最近一直碰到一些问题。特写个小结。
1、从ports安装:
从天网上搜索socks5-v1.0r11.tar.gz,然后复制到/usr/ports/distfiles,进入/usr/ports/net/socks5,打入make install命令,可总是安装不成功:
===> Vulnerability check disabled, database not found
===> Extracting for socks5-1.0.11_3
=> Checksum mismatch for socks5-v1.0r11.tar.gz.
===> Refetch for 1 more times files: socks5-v1.0r11.tar.gz
===> Vulnerability check disabled, database not found
=> socks5-v1.0r11.tar.gz doesn’t seem to exist in /usr/ports/distfiles/.
=> Attempting to fetch from ftp://ftp.FreeBSD.org/pub/FreeBSD/ports/distfiles/.
fetch: ftp://ftp.FreeBSD.org/pub/FreeBSD/ports/distfiles/socks5-v1.0r11.tar.gz: File unavailable (e.g., file not found, no access)
=> Couldn’t fetch it – please try to retrieve this
=> port manually into /usr/ports/distfiles/ and try again.
*** Error code 1Stop in /usr/ports/net/socks5.
*** Error code 1Stop in /usr/ports/net/socks5.
2、直接编译安装包(笔记),安装时一点错误也没有,但使用时就出现问题,刚启动服务器时能用一段时间,大约一二分针,过会测试,就发现1080端口就再也连不上。具体原因还不太清楚,个人怀疑可能是安装包版本的原因。
仔细想想,如果是版本原因,那如果在ports中安装成功的话应该就排除版本的原因了,所以最后还是选择从ports 安装。可安装了十几次,还是出现第一次方法的错误。一直提示在/usr/ports/distfiles中找不到socks5-v1.0r11.tar.gz安装包,奇怪,明明我把包复制到/urs/ports/distfiles的。实在没办法,在freebsdchina.org上发了个贴子,坛友suek225提到了MD5检验出错,安装包大小的问题。安照他的方法:
# cd /usr/ports/net/socks5
# more distinfo
MD5 (socks5-v1.0r11.tar.gz) = 9d6db7d3c425bbafb8c8d67e128eedfe
SIZE (socks5-v1.0r11.tar.gz) = 401093
很明显,安装包的大小为401093 kb,找了相同大小的包复制到/usr/ports/distfiles中,进入 /usr/ports/net/socks5,运行make install,成功安装。接下来完成以下操作就可以运行socks5了:
1、配置socks5.conf及socks5.passwd
# ee /etc/socks5.conf
加入如下内容:
auth – – u
permit u – 172.16.0. – – –
set SOCKS5_NOIDENT
set SOCKS5_V4SUPPORT
set SOCKS5_PWDFILE /etc/socks5.passwd# ee /etc/socks5.passwd
加入如下内容:
user password2、设置随系统一起启动
#ee /etc/rc.local
加入如下内容:
/usr/local/bin/socks5重启服务器。
小结:安装socks5-v1.0r11.tar.gz,我以后还是尽量ports安装,从ports安装成功,至少说明安装包的版本应该没问题。
freebsd5.4下ipfilter+ipnat包过滤、转发和DHCP服务器架构笔记
通过架设此服务器,使网内客户端不用任何网络的配置,就可以直接网络互联网。
网络信息:
网段 -> 192.168.61.0/24
xl0 -> 内网网卡 192.168.61.254 (dhcp网卡)
em0 -> 外网网卡 218.104.52.x/32
一、安装freebsd4.11STABLE
从http://www.freebsd.org/releases/4.11R/announce.html选择一个FTP服务器下载,然后刻成光盘。接下来从光盘安装,我的几点选项:
1、选择软件包时选择最小化安装。
2、编辑inetd.conf时开通ftp及telnet服务。
其它的都默认安装,具体可参考:<http://www.freebsd.org.cn/snap/doc/zh_CN.GB2312/books/handbook/install-start.html>,安装完后重启机器。
二、配置freebsd
1、配置/etc/rc.conf:
hostname="gateway_bake.jscpu.com"
defaultrouter="218.104.52.x"
ifconfig_em0="inet 218.104.52.x netmask 255.255.255.248"
ifconfig_xl0="inet 192.168.61.254 netmask 255.255.255.0"
ipfilter_enable="YES"
ipfilter_rules="/etc/ipf.conf"
ipnat_enable="YES"
ipnat_rules="/etc/ipnat.conf"
gateway_enable="YES"
inetd_enable="YES"
kern_securelevel_enable="NO"
linux_enable="YES"
nfs_reserved_port_only="YES"
sendmail_enable="NONE"
sshd_enable="YES"
usbd_enable="NO"
2、配置/etc/resolv.conf:
domain jscpu.com
nameserver 218.104.48.106
nameserver 221.6.4.66
3、将光盘放入光驱中,安装ports和src
# /stand/sysinstall
然后选择Configure–>Distributions,然后利用空格键选择src和ports两项,点install,安装完成后重启机器。
三、配置内核
# cd /usr/src//sys/i386/conf
# cp GENERIC funpower
# ee funpower
内核文件具体如下:
#
# GENERIC — Generic kernel configuration file for FreeBSD/i386
#
# For more information on this file, please read the handbook section on
# Kernel Configuration Files:
#
# http://www.FreeBSD.org/doc/en_US.ISO8859-1/books/handbook/kernelconfig-config.html
#
# The handbook is also available locally in /usr/share/doc/handbook
# if you’ve installed the doc distribution, otherwise always see the
# FreeBSD World Wide Web server (http://www.FreeBSD.org/) for the
# latest information.
#
# An exhaustive list of options and more detailed explanations of the
# device lines is also present in the ./LINT configuration file. If you are
# in doubt as to the purpose or necessity of a line, check first in LINT.
#
# $FreeBSD: src/sys/i386/conf/GENERIC,v 1.246.2.62.2.1 2005/01/14 03:07:39 scottl Exp $
machine i386
#cpu I386_CPU
#cpu I486_CPU
#cpu I586_CPU
cpu I686_CPU
ident funpower
maxusers 0
#makeoptions DEBUG=-g #Build kernel with gdb(1) debug symbols
options MATH_EMULATE #Support for x87 emulation
options INET #InterNETworking
#options INET6 #IPv6 communications protocols
options FFS #Berkeley Fast Filesystem
options FFS_ROOT #FFS usable as root device [keep this!]
options SOFTUPDATES #Enable FFS soft updates support
options UFS_DIRHASH #Improve performance on big directories
options MFS #Memory Filesystem
options MD_ROOT #MD is a potential root device
options NFS #Network Filesystem
options NFS_ROOT #NFS usable as root device, NFS required
options MSDOSFS #MSDOS Filesystem
options CD9660 #ISO 9660 Filesystem
options CD9660_ROOT #CD-ROM usable as root, CD9660 required
options PROCFS #Process filesystem
options COMPAT_43 #Compatible with BSD 4.3 [KEEP THIS!]
options SCSI_DELAY=15000 #Delay (in ms) before probing SCSI
options UCONSOLE #Allow users to grab the console
options USERCONFIG #boot -c editor
options VISUAL_USERCONFIG #visual boot -c editor
options KTRACE #ktrace(1) support
options SYSVSHM #SYSV-style shared memory
options SYSVMSG #SYSV-style message queues
options SYSVSEM #SYSV-style semaphores
options P1003_1B #Posix P1003_1B real-time extensions
options _KPOSIX_PRIORITY_SCHEDULING
options ICMP_BANDLIM #Rate limit bad replies
options KBD_INSTALL_CDEV # install a CDEV entry in /dev
options AHC_REG_PRETTY_PRINT # Print register bitfields in debug
# output. Adds ~128k to driver.
options AHD_REG_PRETTY_PRINT # Print register bitfields in debug
# output. Adds ~215k to driver.
# To make an SMP kernel, the next two are needed
#options SMP # Symmetric MultiProcessor Kernel
#options APIC_IO # Symmetric (APIC) I/O
options IPFILTER
options IPFILTER_LOG
options IPFILTER_DEFAULT_BLOCK
device isa
device eisa
device pci
# Floppy drives
device fdc0 at isa? port IO_FD1 irq 6 drq 2
device fd0 at fdc0 drive 0
device fd1 at fdc0 drive 1
#
# If you have a Toshiba Libretto with its Y-E Data PCMCIA floppy,
# don’t use the above line for fdc0 but the following one:
#device fdc0
# ATA and ATAPI devices
device ata0 at isa? port IO_WD1 irq 14
device ata1 at isa? port IO_WD2 irq 15
device ata
device atadisk # ATA disk drives
device atapicd # ATAPI CDROM drives
device atapifd # ATAPI floppy drives
device atapist # ATAPI tape drives
options ATA_STATIC_ID #Static device numbering
# SCSI Controllers
#device ahb # EISA AHA1742 family
#device ahc # AHA2940 and onboard AIC7xxx devices
#device ahd # AHA39320/29320 and onboard AIC79xx devices
#device amd # AMD 53C974 (Tekram DC-390(T))
#device isp # Qlogic family
#device mpt # LSI-Logic MPT/Fusion
#device ncr # NCR/Symbios Logic
#device sym # NCR/Symbios Logic (newer chipsets)
#options SYM_SETUP_LP_PROBE_MAP=0x40
# Allow ncr to attach legacy NCR devices when
# both sym and ncr are configured
device adv0 at isa?
device adw
device bt0 at isa?
device aha0 at isa?
device aic0 at isa?#
device ncv # NCR 53C500
device nsp # Workbit Ninja SCSI-3
device stg # TMC 18C30/18C50
# SCSI peripherals
device scbus # SCSI bus (required)
#device da # Direct Access (disks)
#device sa # Sequential Access (tape etc)
#device cd # CD
#device pass # Passthrough device (direct SCSI access)
# RAID controllers interfaced to the SCSI subsystem
#device asr # DPT SmartRAID V, VI and Adaptec SCSI RAID
#device dpt # DPT Smartcache – See LINT for options!
#device iir # Intel Integrated RAID
#device mly # Mylex AcceleRAID/eXtremeRAID
#device ciss # Compaq SmartRAID 5* series
#device twa # 3ware 9000 series PATA/SATA RAID
# RAID controllers
#device aac # Adaptec FSA RAID, Dell PERC2/PERC3
device aacp # SCSI passthrough for aac (requires CAM)
#device ida # Compaq Smart RAID
#device ips # IBM/Adaptec ServeRAID
#device amr # AMI MegaRAID
#device mlx # Mylex DAC960 family
#device pst # Promise Supertrak SX6000
#device twe # 3ware Escalade
# atkbdc0 controls both the keyboard and the PS/2 mouse
device atkbdc0 at isa? port IO_KBD
device atkbd0 at atkbdc? irq 1 flags 0x1
device psm0 at atkbdc? irq 12
device vga0 at isa?
# splash screen/screen saver
pseudo-device splash
# syscons is the default console driver, resembling an SCO console
device sc0 at isa? flags 0x100
# Enable this and PCVT_FREEBSD for pcvt vt220 compa
tible con
sole driver
#device vt0
at isa?
#options XSERVER # support for X server on a vt console
#options FAT_CURSOR # start with block cursor
# If you have a ThinkPAD, uncomment this along with the rest of the PCVT lines
#options PCVT_SCANSET=2 # IBM keyboards are non-std
device agp # support several AGP chipsets
# Floating point support – do not disable.
device npx0 at nexus? port IO_NPX irq 13
# Power management support (see LINT for more options)
device apm0 at nexus? disable flags 0x20 # Advanced Power Management
# PCCARD (PCMCIA) support
#device card
#device pcic0 at isa? irq 0 port 0x3e0 iomem 0xd0000
#device pcic1 at isa? irq 0 port 0x3e2 iomem 0xd4000 disable
# Serial (COM) ports
#device sio0 at isa? port IO_COM1 flags 0x10 irq 4
#device sio1 at isa? port IO_COM2 irq 3
#device sio2 at isa? disable port IO_COM3 irq 5
#device sio3 at isa? disable port IO_COM4 irq 9
# Parallel port
device ppc0 at isa? irq 7
device ppbus # Parallel port bus (required)
device lpt # Printer
device plip # TCP/IP over parallel
device ppi # Parallel port interface device
#device vpo # Requires scbus and da
# PCI Ethernet NICs.
device de # DEC/Intel DC21x4x (“Tulip”)
device em # Intel PRO/1000 adapter Gigabit Ethernet Card (“Wiseman”)
device txp # 3Com 3cR990 (“Typhoon”)
device vx # 3Com 3c590, 3c595 (“Vortex”)
# PCI Ethernet NICs that use the common MII bus controller code.
# NOTE: Be sure to keep the ‘device miibus’ line in order to use these NICs!
device miibus # MII bus support
#device dc # DEC/Intel 21143 and various workalikes
#device fxp # Intel EtherExpress PRO/100B (82557, 82558)
#device pcn # AMD Am79C97x PCI 10/100 NICs
#device rl # RealTek 8129/8139
#device sf # Adaptec AIC-6915 (“Starfire”)
#device sis # Silicon Integrated Systems SiS 900/SiS 7016
#device ste # Sundance ST201 (D-Link DFE-550TX)
#device tl # Texas Instruments ThunderLAN
#device tx # SMC EtherPower II (83c170 “EPIC”)
#device vr # VIA Rhine, Rhine II
#device wb # Winbond W89C840F
device xl # 3Com 3c90x (“Boomerang”, “Cyclone”)
#device bge # Broadcom BCM570x (“Tigon III”)
# ISA Ethernet NICs.
# ‘device ed’ requires ‘device miibus’
device ed0 at isa? disable port 0x280 irq 10 iomem 0xd8000
device ex
device ep
device fe0 at isa? disable port 0x300
# Xircom Ethernet
device xe
# PRISM I IEEE 802.11b wireless NIC.
device awi
# WaveLAN/IEEE 802.11 wireless NICs. Note: the WaveLAN/IEEE really
# exists only as a PCMCIA device, so there is no ISA attachment needed
# and resources will always be dynamically assigned by the pccard code.
device wi
# Aironet 4500/4800 802.11 wireless NICs. Note: the declaration below will
# work for PCMCIA and PCI cards, as well as ISA cards set to ISA PnP
# mode (the factory default). If you set the switches on your ISA
# card for a manually chosen I/O address and IRQ, you must specify
# those parameters here.
device an
# The probe order of these is presently determined by i386/isa/isa_compat.c.
device ie0 at isa? disable port 0x300 irq 10 iomem 0xd0000
#device le0 at isa? disable port 0x300 irq 5 iomem 0xd0000
device lnc0 at isa? disable port 0x280 irq 10 drq 0
device cs0 at isa? disable port 0x300
device sn0 at isa? disable port 0x300 irq 10
# Pseudo devices – the number indicates how many units to allocate.
pseudo-device loop # Network loopback
pseudo-device ether # Ethernet support
#pseudo-device sl 1 # Kernel SLIP
#pseudo-device ppp 1 # Kernel PPP
pseudo-device tun # Packet tunnel.
pseudo-device pty # Pseudo-ttys (telnet etc)
pseudo-device md # Memory "disks"
#pseudo-device gif # IPv6 and IPv4 tunneling
#pseudo-device faith 1 # IPv6-to-IPv4 relaying (translation)
# The `bpf’ pseudo-device enables the Berkeley Packet Filter.
# Be aware of the administrative consequences of enabling this!
pseudo-device bpf #Berkeley packet filter
# USB support
#device uhci # UHCI PCI->USB interface
#device ohci # OHCI PCI->USB interface
device usb # USB Bus (required)
#device ugen # Generic
#device uhid # "Human Interface Devices"
#device ukbd # Keyboard
#device ulpt # Printer
#device umass # Disks/Mass storage – Requires scbus and da
#device ums # Mouse
#device uscanner # Scanners
#device urio # Diamond Rio MP3 Player
# USB Ethernet, requires mii
#device aue # ADMtek USB ethernet
#device axe # ASIX Electronics USB ethernet
#device cue # CATC USB ethernet
#device kue # Kawasaki LSI USB ethernet
# FireWire support
device firewire # FireWire bus code
device sbp # SCSI over FireWire (Requires scbus and da)
device fwe # Ethernet over FireWire (non-standard!)
编辑好funpower后开始编译安装内核:
#/usr/sbin/config funpower
#cd ../../compile/funpower
#make depend
#make
#make intall
编译安装完成后重启机器。
四、配置包过滤(ipfilter)及包转发(ipnat)服务
1、编辑/etc/ipf.conf
block in log quick all with short
block in log quick all with ipopts
block in log quick all with frag
block in log quick all with opt lsrr
block in log quick all with opt ssrr
pass out on xl0 all
pass in on xl0 all
pass out quick on lo0 all
pass in quick on lo0 all
block out on em0 all
block out log on em0 from any to 192.168.0.0/16
block out log quick on em0 from any to 0.0.0.0/8
block out log quick on em0 from any to 169.254.0.0/8
block out log quick on em0 from any to 10.0.0.0/8
block out log quick on em0 from any to 127.16.0.0/12
block out log quick on em0 from any to 127.0.0.0/8
block out log quick on em0 from any to 192.0.2.0/24
block out log quick on em0 from any to 204.152.64.0/23
block out log quick on em0 from any to 224.0.0.0/3
pass in quick on em0 proto tcp from any to 218.104.52.x port = 22 flags S keep state
pass in quick on em0 proto tcp from any to 218.104.52.x port = 23 flags S keep state
pass out log on em0 proto tcp/udp from any to any keep state
pass out log on em0 proto icmp all keep state
block in log on em0 from 192.168.0.0/16 to any
block in log quick on em0 from 10.0.0.0/8 to any
block in log quick on em0 from 172.16.0.0/12 to any
block in log quick on em0 from 127.0.0.0/8 to any
block in log quick on em0 from 192.0.2.0/24 to any
block in log quick on em0 from 169.254.0.0/16 to any
block in log quick on em0 from 224.0.0.0/3 to any
block in log quick on em0 from 204.152.64.0/23 to any
pass in quick on em0 proto tcp from any to any port = 80 flags S/SA keep state
pass in quick on em0 proto tcp from any to any port = ftp flags S/SA keep state
pass in quick on em0 proto tcp from any to any port = ftp-data flags S/SA keep state
pass in quick on em0 proto tcp from any to any port 30000 >< 50001 flags S/SA keep state
block in quick on em0 all
block in log quick on em0 proto icmp from any to any icmp-type redir
block in log quick on em0 proto icmp from any to any
block in log quick on em0 proto icmp from any to any icmp-type echo
block return-rst in log on em0 proto tcp from any to any flags S/SA
block return-icmp(net-unr) in log on em0 proto udp from any to any
2、编辑/etc/ipnat.conf
map em0 192.168.61.0/24 -> 218.104.52.x/32 portmap tcp/udp 20000:39999
map em0 192.168.61.0/24 -> 218.104.52.x/32
map xl0 192.168.61.0/24 -> 218.104.52.x/32
map em0 192.168.61.0/24 -> 218.104.52.x/32 proxy port ftp ftp/tcp
五、配置DHCP服务
1、通过ports安装isc-dhcp3-server



