===================================================================
开源堡垒机Jumpserver安装/配置系列:
1、Centos8上试用开源堡垒机Jumpserver 1.5.6(一):堡垒机概述
2、Centos8上试用开源堡垒机Jumpserver 1.5.6(二):安装Centos8(CentOS-8.1.1911-x86_64-dvd1.iso)
3、Centos8上试用开源堡垒机Jumpserver 1.5.6(三):在Centos8上安装Jumpserver
4、Centos8上试用开源堡垒机Jumpserver 1.5.6(四):添加被管资源与运维帐户权限分配
5、Centos8上试用开源堡垒机Jumpserver 1.5.6(五):通过堡垒机进行运维管理
6、Centos8上试用开源堡垒机Jumpserver 1.5.6(六):试用批量命令和命令过滤功能
7、Centos8上试用开源堡垒机Jumpserver 1.5.6(七):服务器重启后的恢复操作(手工启动jumpserver等程序)
8、Centos8上试用开源堡垒机Jumpserver 1.5.6(八):创建用户时使用密码链接并发邮件给用户功能
===================================================================
目前Jumpserver开源堡垒机的最新版本为1.5.6,本次将按照官方“CentOS 8 安装文档”来进行配置,具体配置如下(root用户登陆):
1、更新软件库
通过以下命令完成更新:
[root@localhost ~]# yum update –y

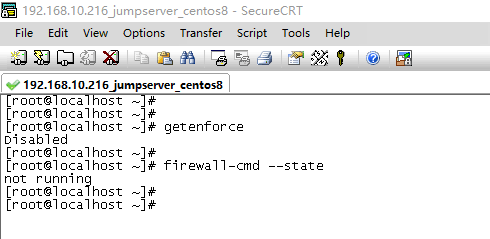
2、关闭防火墙和关闭SELinux
Jumpserver需要开放80(nginx)和2222(SSH登陆端口koko)两个端口,后期远程管理也需要开放相应端口,这里直接将防火墙关闭:
[root@localhost ~]# firewall-cmd –state
running
[root@localhost ~]#
关闭firewall,并禁止防火墙开机启动,命令如下:
[root@localhost ~]# systemctl stop firewalld.service
[root@localhost ~]# systemctl disable firewalld.service
接着将SELinux关闭,运行如下命令编辑SELINUX配置文件:
[root@localhost ~]# vi /etc/selinux/config
并将SELINUX=enforcing改成SELINUX=disable,如下:
# This file controls the state of SELinux on the system.
# SELINUX= can take one of these three values:
# enforcing – SELinux security policy is enforced.
# permissive – SELinux prints warnings instead of enforcing.
# disabled – No SELinux policy is loaded.
SELINUX=disabled
# SELINUXTYPE= can take one of these three values:
# targeted – Targeted processes are protected,
# minimum – Modification of targeted policy. Only selected processes are protected.
# mls – Multi Level Security protection.
SELINUXTYPE=targeted
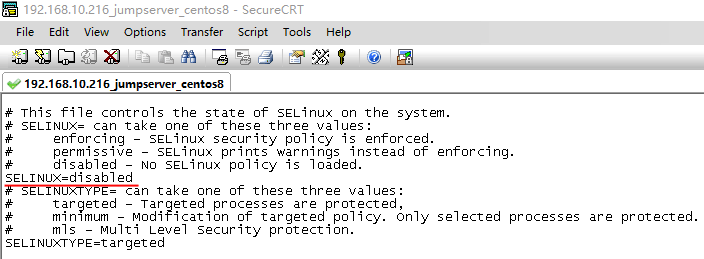
修改完成后,重启机器,重启后运行getenforce命令查看已经关闭SELinux。
3、安装依赖包
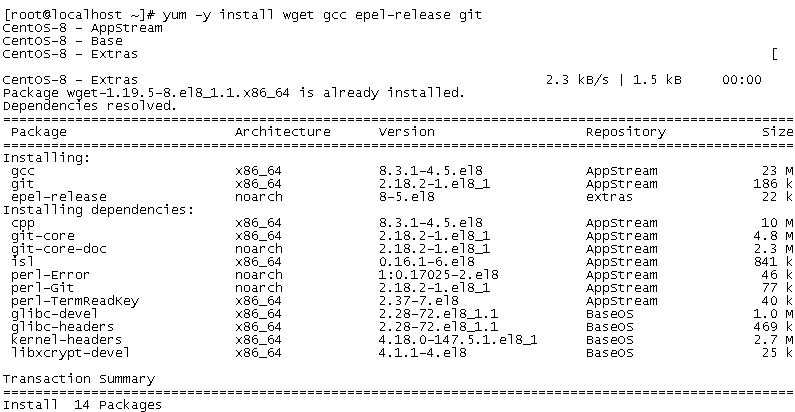
安装wget、gcc等依赖包:
[root@localhost ~]# yum -y install wget gcc epel-release git
4、安装Redis
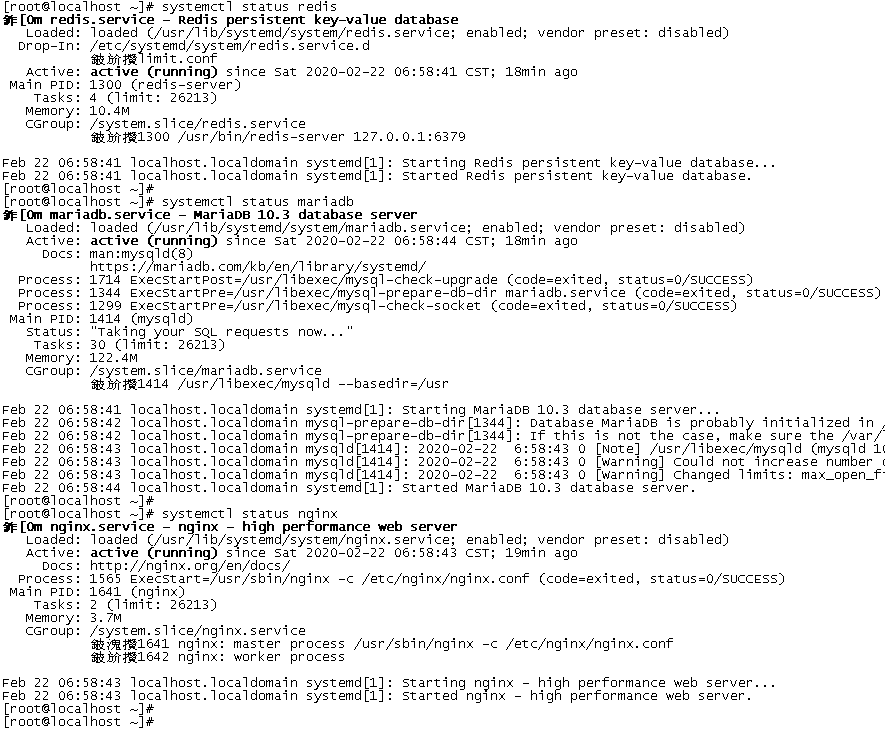
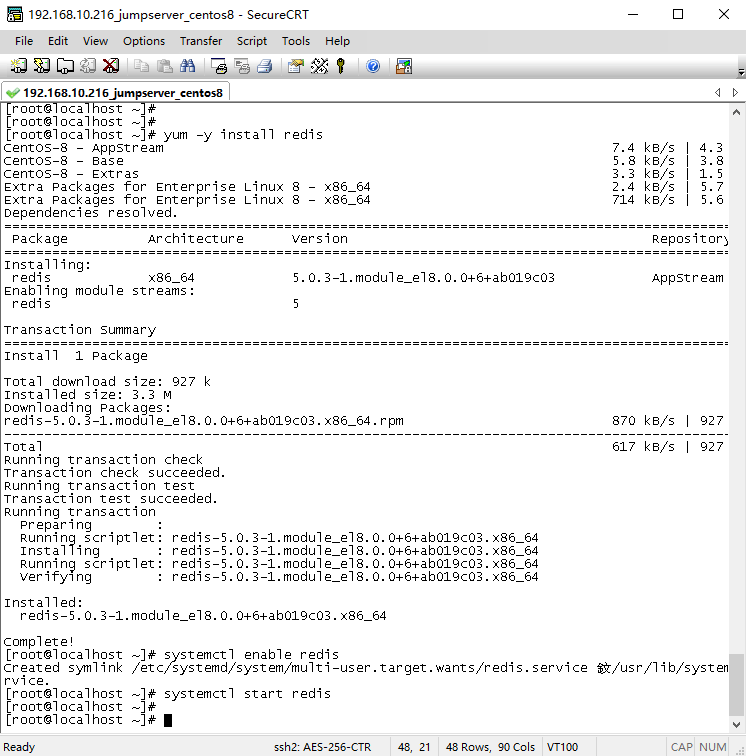
Jumpserver使用Redis做cache和celery broke,,安装redis,设置为开机启动模式,并启动程序,操作如下:
[root@localhost ~]# yum -y install redis
[root@localhost ~]# systemctl enable redis
Created symlink /etc/systemd/system/multi-user.target.wants/redis.service 鈫/usr/lib/systemd/system/redis.service.
[root@localhost ~]# systemctl start redis
[root@localhost ~]#
5、安装并配置MySQL数据库
开始安装mysql,开源也叫mariadb,操作如下:
[root@localhost ~]# systemctl enable mariadb
[root@localhost ~]# systemctl enable mariadb
Created symlink /etc/systemd/system/mysql.service 鈫/usr/lib/systemd/system/mariadb.service.
Created symlink /etc/systemd/system/mysqld.service 鈫/usr/lib/systemd/system/mariadb.service.
Created symlink /etc/systemd/system/multi-user.target.wants/mariadb.service 鈫/usr/lib/systemd/system/mariadb.service.
[root@localhost ~]#
[root@localhost ~]# systemctl start mariadb
[root@localhost ~]#
接着开始创建数据库,并将数据库授权,操作如下:
生成随机数据库密码:
[root@localhost ~]# DB_PASSWORD=`cat /dev/urandom | tr -dc A-Za-z0-9 | head -c 24`
[root@localhost ~]#
[root@localhost ~]# echo -e “\033[31m 你的数据库密码是 $DB_PASSWORD \033[0m”
你的数据库密码是 vqMlQ8FhEkhXVCZHGgRatXIp
[root@localhost ~]#
[root@localhost ~]#

创建jumpserver数据库,如下:
[root@localhost ~]# mysql -uroot -e “create database jumpserver default charset ‘utf8’; grant all on jumpserver.* to ‘jumpserver’@’127.0.0.1’ identified by ‘$DB_PASSWORD’; flush privileges;”
[root@localhost ~]#
到此,数据库创建完成。
6、安装Nginx
由于jumpserver整个软件安装了多个组件,除了jumpserver主站点外,还有koko、guacamole等,通过Nginx来整合各个组件,操作如下:
创建repo文件:
[root@localhost ~]# vi /etc/yum.repos.d/nginx.repo
输入如下内容:
[nginx-stable]
name=nginx stable repo
baseurl=http://nginx.org/packages/centos/$releasever/$basearch/
gpgcheck=1
enabled=1
gpgkey=https://nginx.org/keys/nginx_signing.key
module_hotfixes=true
开始安装nginx,并设置为开机自启动:
[root@localhost ~]# yum -y install nginx
[root@localhost ~]# systemctl enable nginx
Created symlink /etc/systemd/system/multi-user.target.wants/nginx.service 鈫/usr/lib/systemd/system/nginx.service.
[root@localhost ~]#
7、安装Python3.6
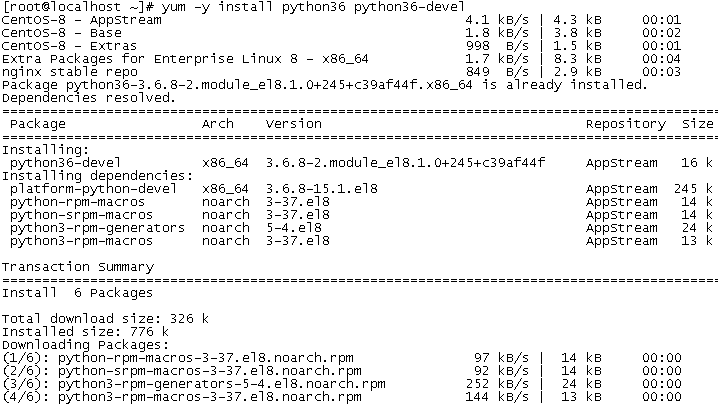
开始安装:
[root@localhost ~]# yum -y install python36 python36-devel
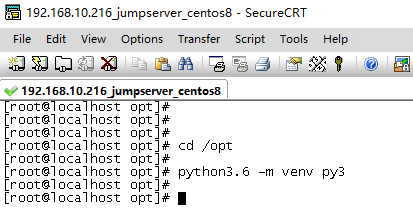
配置并进入Python3虚拟环境,首先定义一个虚拟环境名称,本例为py3,如下:
[root@localhost opt]# cd /opt
[root@localhost opt]# python3.6 -m venv py3
[root@localhost opt]#
接着进入py3虚拟环境,看到py3开头的提示符号代表成功进入,以后运行jumpserver都要先进入py3环境。
[root@localhost opt]# source /opt/py3/bin/activate
(py3) [root@localhost opt]#
(py3) [root@localhost opt]#

注意:以下开始的步骤都需要在py3环境中执行。
8、安装Jumpserver
下载jumpserver,完成后/opt目录下会产生一个jumpserver的文件夹:
(py3) [root@localhost opt]# git clone –depth=1 https://github.com/jumpserver/jumpserver.git

安装依据包:
[root@localhost opt]# yum -y install gcc krb5-devel libtiff-devel libjpeg-devel libzip-devel freetype-devel libwebp-devel tcl-devel tk-devel sshpass openldap-devel mariadb-devel libffi-devel openssh-clients telnet openldap-clients
接着安装Python库依赖包:
(py3) [root@localhost opt]#
(py3) [root@localhost opt]# pip install wheel
(py3) [root@localhost opt]# pip install –upgrade pip
编辑依赖包清单requirements.txt文件,暂时去掉python-gssapi==0.6.4:
(py3) [root@localhost opt]# vi /opt/jumpserver/requirements/requirements.txt

安装依赖包清单里的软件:
(py3) [root@localhost opt]# pip install -r /opt/jumpserver/requirements/requirements.txt -i https://mirrors.aliyun.com/pypi/simple/

完成后,将requirements.txt中将python-gssapi-0.6.4的注释去掉,再执行一次安装命令,完成安装。
(py3) [root@localhost opt]# pip install -r /opt/jumpserver/requirements/requirements.txt -i https://mirrors.aliyun.com/pypi/simple/

9、配置和启动jumpserver
修改jumpserver配置文件,复制一份示例文件:
(py3) [root@localhost opt]# cd jumpserver
(py3) [root@localhost jumpserver]# cp config_example.yml config.yml
(py3) [root@localhost jumpserver]#

然后对配置文件作如下修改:
(py3) [root@localhost jumpserver]#
(py3) [root@localhost jumpserver]# SECRET_KEY=`cat /dev/urandom | tr -dc A-Za-z0-9 | head -c 50`
(py3) [root@localhost jumpserver]# echo “SECRET_KEY=$SECRET_KEY” >> ~/.bashrc
(py3) [root@localhost jumpserver]# BOOTSTRAP_TOKEN=`cat /dev/urandom | tr -dc A-Za-z0-9 | head -c 16`
(py3) [root@localhost jumpserver]# echo “BOOTSTRAP_TOKEN=$BOOTSTRAP_TOKEN” >> ~/.bashrc
(py3) [root@localhost jumpserver]#
(py3) [root@localhost jumpserver]# sed -i “s/SECRET_KEY:/SECRET_KEY: $SECRET_KEY/g” /opt/jumpserver/config.yml
(py3) [root@localhost jumpserver]# sed -i “s/BOOTSTRAP_TOKEN:/BOOTSTRAP_TOKEN: $BOOTSTRAP_TOKEN/g” /opt/jumpserver/config.yml
(py3) [root@localhost jumpserver]# sed -i “s/# DEBUG: true/DEBUG: false/g” /opt/jumpserver/config.yml
(py3) [root@localhost jumpserver]# sed -i “s/# LOG_LEVEL: DEBUG/LOG_LEVEL: ERROR/g” /opt/jumpserver/config.yml
(py3) [root@localhost jumpserver]# sed -i “s/# SESSION_EXPIRE_AT_BROWSER_CLOSE: false/SESSION_EXPIRE_AT_BROWSER_CLOSE: true/g” /opt/jumpserver/config.yml
(py3) [root@localhost jumpserver]# sed -i “s/DB_PASSWORD: /DB_PASSWORD: $DB_PASSWORD/g” /opt/jumpserver/config.yml
(py3) [root@localhost jumpserver]# echo -e “\033[31m 你的SECRET_KEY是 $SECRET_KEY \033[0m”
你的SECRET_KEY是 fKk8ZyJlq6UCQZqowD3tOHXoJ86BfEaY6fMVsMfDzY4kTLQLja
(py3) [root@localhost jumpserver]# echo -e “\033[31m 你的BOOTSTRAP_TOKEN是 $BOOTSTRAP_TOKEN \033[0m”
你的BOOTSTRAP_TOKEN是 H4x1afiqgY3MXCiD
(py3) [root@localhost jumpserver]#
修改完成后,检查下配置,特别是以下行中DB_PASSWORD中是否有密码,正常是有刚才随机的密码:
DB_HOST: 127.0.0.1
DB_PORT: 3306
DB_USER: jumpserver
DB_PASSWORD: vqMlQ8FhEkhXVCZHGgRatXIp
DB_NAME: jumpserver
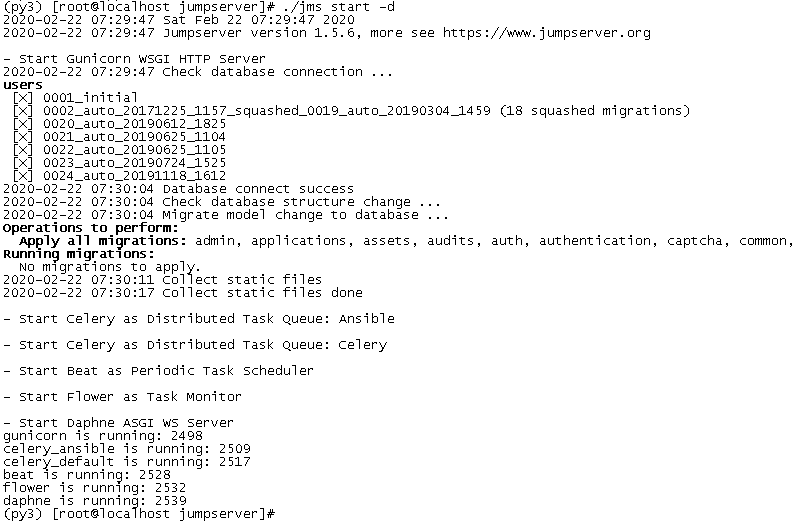
最后启动jumpserver,通过./jms start –d命令,如下:
(py3) [root@localhost /]# cd /opt/jumpserver/
(py3) [root@localhost jumpserver]#
(py3) [root@localhost jumpserver]# ./jms start -d
2020-02-09 09:32:35 Sun Feb 9 09:32:35 2020
2020-02-09 09:32:35 Jumpserver version 1.5.6, more see https://www.jumpserver.org
– Start Gunicorn WSGI HTTP Server
2020-02-09 09:32:35 Check database connection …
users
[ ] 0001_initial
[ ] 0002_auto_20171225_1157_squashed_0019_auto_20190304_1459 (18 squashed migrations)
[ ] 0020_auto_20190612_1825
[ ] 0021_auto_20190625_1104
[ ] 0022_auto_20190625_1105
[ ] 0023_auto_20190724_1525
[ ] 0024_auto_20191118_1612
2020-02-09 09:32:41 Database connect success
2020-02-09 09:32:41 Check database structure change …
2020-02-09 09:32:41 Migrate model change to database …
Operations to perform:
Apply all migrations: admin, applications, assets, audits, auth, authentication, captcha, common, contenttypes, django_celery_beat, ops, orgs, perms, sessions, settings, terminal, tickets, users
Running migrations:
Applying contenttypes.0001_initial… OK
Applying contenttypes.0002_remove_content_type_name… OK
Applying auth.0001_initial… OK
Applying auth.0002_alter_permission_name_max_length… OK
Applying auth.0003_alter_user_email_max_length… OK
Applying auth.0004_alter_user_username_opts… OK
Applying auth.0005_alter_user_last_login_null… OK
Applying auth.0006_require_contenttypes_0002… OK
Applying auth.0007_alter_validators_add_error_messages… OK
Applying auth.0008_alter_user_username_max_length… OK
Applying users.0001_initial… OK
Applying admin.0001_initial… OK
Applying admin.0002_logentry_remove_auto_add… OK
Applying admin.0003_logentry_add_action_flag_choices… OK
Applying users.0002_auto_20171225_1157_squashed_0019_auto_20190304_1459… OK
Applying assets.0001_initial… OK
Applying perms.0001_initial… OK
Applying assets.0002_auto_20180105_1807_squashed_0009_auto_20180307_1212… OK
Applying assets.0010_auto_20180307_1749_squashed_0019_auto_20180816_1320… OK
Applying perms.0002_auto_20171228_0025_squashed_0009_auto_20180903_1132… OK
Applying perms.0003_action… OK
Applying perms.0004_assetpermission_actions… OK
Applying assets.0020_auto_20180816_1652… OK
Applying assets.0021_auto_20180903_1132… OK
Applying assets.0022_auto_20181012_1717… OK
Applying assets.0023_auto_20181016_1650… OK
Applying assets.0024_auto_20181219_1614… OK
Applying assets.0025_auto_20190221_1902… OK
Applying assets.0026_auto_20190325_2035… OK
Applying applications.0001_initial… OK
Applying perms.0005_auto_20190521_1619… OK
Applying perms.0006_auto_20190628_1921… OK
Applying perms.0007_remove_assetpermission_actions… OK
Applying perms.0008_auto_20190911_1907… OK
Applying assets.0027_auto_20190521_1703… OK
Applying assets.0028_protocol… OK
Applying assets.0029_auto_20190522_1114… OK
Applying assets.0030_auto_20190619_1135… OK
Applying assets.0031_auto_20190621_1332… OK
Applying assets.0032_auto_20190624_2108… OK
Applying assets.0033_auto_20190624_2108… OK
Applying assets.0034_auto_20190705_1348… OK
Applying assets.0035_auto_20190711_2018… OK
Applying assets.0036_auto_20190716_1535… OK
Applying assets.0037_auto_20190724_2002… OK
Applying assets.0038_auto_20190911_1634… OK
Applying perms.0009_remoteapppermission_system_users… OK
Applying applications.0002_remove_remoteapp_system_user… OK
Applying applications.0003_auto_20191210_1659… OK
Applying applications.0004_auto_20191218_1705… OK
Applying assets.0039_authbook_is_active… OK
Applying assets.0040_auto_20190917_2056… OK
Applying assets.0041_gathereduser… OK
Applying assets.0042_favoriteasset… OK
Applying assets.0043_auto_20191114_1111… OK
Applying assets.0044_platform… OK
Applying assets.0045_auto_20191206_1607… OK
Applying assets.0046_auto_20191218_1705… OK
Applying audits.0001_initial… OK
Applying audits.0002_ftplog_org_id… OK
Applying audits.0003_auto_20180816_1652… OK
Applying audits.0004_operatelog_passwordchangelog_userloginlog… OK
Applying audits.0005_auto_20190228_1715… OK
Applying audits.0006_auto_20190726_1753… OK
Applying audits.0007_auto_20191202_1010… OK
Applying auth.0009_alter_user_last_name_max_length… OK
Applying authentication.0001_initial… OK
Applying authentication.0002_auto_20190729_1423… OK
Applying authentication.0003_loginconfirmsetting… OK
Applying captcha.0001_initial… OK
Applying common.0001_initial… OK
Applying common.0002_auto_20180111_1407… OK
Applying common.0003_setting_category… OK
Applying common.0004_setting_encrypted… OK
Applying common.0005_auto_20190221_1902… OK
Applying common.0006_auto_20190304_1515… OK
Applying django_celery_beat.0001_initial… OK
Applying django_celery_beat.0002_auto_20161118_0346… OK
Applying django_celery_beat.0003_auto_20161209_0049… OK
Applying django_celery_beat.0004_auto_20170221_0000… OK
Applying django_celery_beat.0005_add_solarschedule_events_choices_squashed_0009_merge_20181012_1416… OK
Applying django_celery_beat.0006_periodictask_priority… OK
Applying ops.0001_initial… OK
Applying ops.0002_celerytask… OK
Applying ops.0003_auto_20181207_1744… OK
Applying ops.0004_adhoc_run_as… OK
Applying ops.0005_auto_20181219_1807… OK
Applying ops.0006_auto_20190318_1023… OK
Applying ops.0007_auto_20190724_2002… OK
Applying ops.0008_auto_20190919_2100… OK
Applying ops.0009_auto_20191217_1713… OK
Applying ops.0010_auto_20191217_1758… OK
Applying orgs.0001_initial… OK
Applying orgs.0002_auto_20180903_1132… OK
Applying orgs.0003_auto_20190916_1057… OK
Applying users.0020_auto_20190612_1825… OK
Applying users.0021_auto_20190625_1104… OK
Applying users.0022_auto_20190625_1105… OK
Applying users.0023_auto_20190724_1525… OK
Applying users.0024_auto_20191118_1612… OK
Applying perms.0010_auto_20191218_1705… OK
Applying sessions.0001_initial… OK
Applying settings.0001_initial… OK
Applying terminal.0001_initial… OK
Applying terminal.0002_auto_20171228_0025_squashed_0009_auto_20180326_0957… OK
Applying terminal.0010_auto_20180423_1140… OK
Applying terminal.0011_auto_20180807_1116… OK
Applying terminal.0012_auto_20180816_1652… OK
Applying terminal.0013_auto_20181123_1113… OK
Applying terminal.0014_auto_20181226_1441… OK
Applying terminal.0015_auto_20190923_1529… OK
Applying terminal.0016_commandstorage_replaystorage… OK
Applying terminal.0017_auto_20191125_0931… OK
Applying terminal.0018_auto_20191202_1010… OK
Applying terminal.0019_auto_20191206_1000… OK
Applying terminal.0020_auto_20191218_1721… OK
Applying tickets.0001_initial… OK
2020-02-09 09:34:58 Collect static files
2020-02-09 09:35:03 Collect static files done
– Start Celery as Distributed Task Queue: Ansible
– Start Celery as Distributed Task Queue: Celery
– Start Beat as Periodic Task Scheduler
– Start Flower as Task Monitor
– Start Daphne ASGI WS Server
gunicorn is running: 1353
celery_ansible is running: 1364
celery_default is running: 1372
beat is running: 1383
flower is running: 1388
daphne is running: 1402
(py3) [root@localhost jumpserver]#

如上,完成了jumpserver的启动。
10、部署koko和guacamole
koko和guacamole用于远程管理LINUX或WINDOWS主机时使用的连接组件,有本地安装和docker两种方式,本次和官网文档相同,使用docker,不过不使用docker软件,使用podman,原理基本相同。
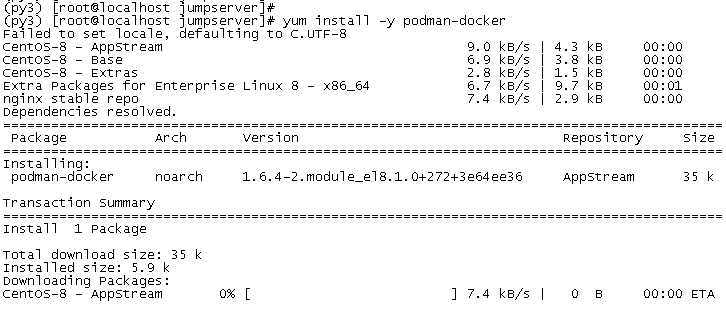
首先安装podman:
(py3) [root@localhost jumpserver]# yum install -y podman-docker
修改别名,这样可以使用docker开头的命令,符合使用习惯:
(py3) [root@localhost jumpserver]# alias docker=podman
(py3) [root@localhost jumpserver]# echo “alias docker=podman” >> ~/.bashrc
配置podman镜像源,编辑/etc/containers/registries.conf文件,将
registries = [‘registry.access.redhat.com’, ‘registry.fedoraproject.org’, ‘registry.centos.org’, ‘docker.io’]
修改为
registries = [‘dockerhub.azk8s.cn’, ‘docker.mirrors.ustc.edu.cn’, ‘docker.io’]
获取服务器IP地址并输入koko和guacamole镜像:
(py3) [root@localhost jumpserver]# Server_IP=`ip addr | grep ‘state UP’ -A2 | grep inet | egrep -v ‘(127.0.0.1|inet6|docker)’ | awk ‘{print $2}’ | tr -d “addr:” | head -n 1 | cut -d / -f1`
(py3) [root@localhost jumpserver]# echo -e “\033[31m 你的服务器IP是 $Server_IP \033[0m”
你的服务器IP是 192.168.10.216
(py3) [root@localhost jumpserver]#
(py3) [root@localhost jumpserver]#
(py3) [root@localhost jumpserver]# docker run –name jms_koko -d -p 2222:2222 -p 127.0.0.1:5000:5000 -e CORE_HOST=http://$Server_IP:8080 -e BOOTSTRAP_TOKEN=$BOOTSTRAP_TOKEN wojiushixiaobai/jms_koko:1.5.6
Trying to pull dockerhub.azk8s.cn/wojiushixiaobai/jms_koko:1.5.6…
Getting image source signatures
Copying blob c6b215e57460 done
Copying blob 2f770ee5b9cf done
Copying blob ab5ef0e58194 done
Copying blob 5192265494e0 done
Copying config 2561f13977 done
Writing manifest to image destination
Storing signatures
769148c0cec1cc8a6b227e9946f48613e3670c33b347862ae07e53d6b2e1ac99
(py3) [root@localhost jumpserver]#
(py3) [root@localhost jumpserver]#
(py3) [root@localhost jumpserver]#
(py3) [root@localhost jumpserver]# docker run –name jms_guacamole -d -p 127.0.0.1:8081:8080 -e JUMPSERVER_SERVER=http://$Server_IP:8080 -e BOOTSTRAP_TOKEN=$BOOTSTRAP_TOKEN wojiushixiaobai/jms_guacamole:1.5.6
Trying to pull dockerhub.azk8s.cn/wojiushixiaobai/jms_guacamole:1.5.6…
Getting image source signatures
Copying blob ab5ef0e58194 skipped: already exists
Copying blob 7e663ccfc7bd done
Copying blob 923a0bfa2671 done
Copying blob 9391bafc9b01 done
Copying config af71674d07 done
Writing manifest to image destination
Storing signatures
9107b7603bf25c48bb939907882591cee524e22bd5c399781694863152fae72f
(py3) [root@localhost jumpserver]#
(py3) [root@localhost jumpserver]#
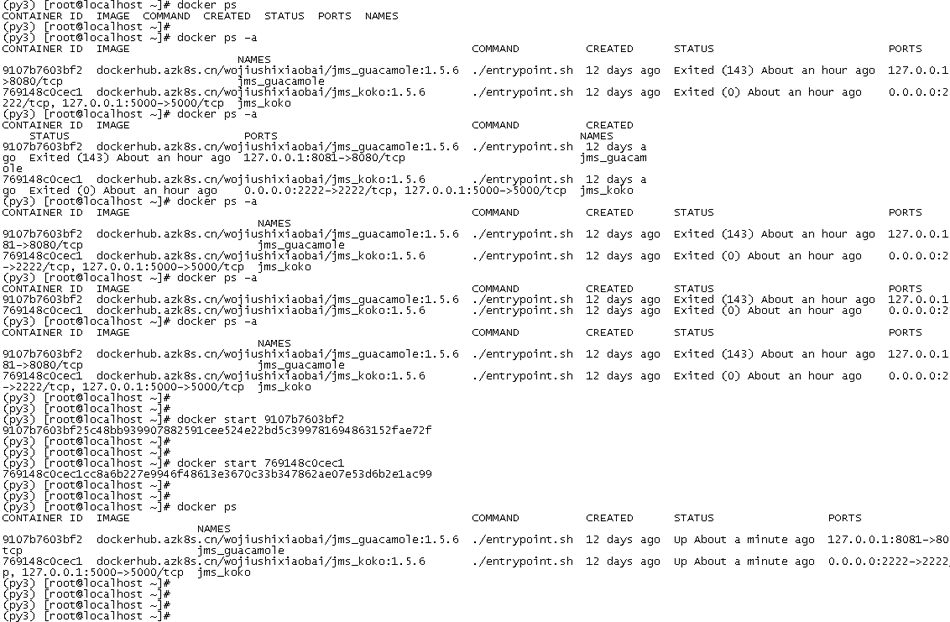
(py3) [root@localhost jumpserver]# docker ps
CONTAINER ID IMAGE COMMAND CREATED STATUS PORTS NAMES
9107b7603bf2 dockerhub.azk8s.cn/wojiushixiaobai/jms_guacamole:1.5.6 ./entrypoint.sh 21 minutes ago Up 21 minutes ago 127.0.0.1:8081->8080/tcp jms_guacamole
769148c0cec1 dockerhub.azk8s.cn/wojiushixiaobai/jms_koko:1.5.6 ./entrypoint.sh 25 minutes ago Up 25 minutes ago 0.0.0.0:2222->2222/tcp, 127.0.0.1:5000->5000/tcp jms_koko
(py3) [root@localhost jumpserver]#
(py3) [root@localhost jumpserver]#
(py3) [root@localhost jumpserver]# docker images
REPOSITORY TAG IMAGE ID CREATED SIZE
dockerhub.azk8s.cn/wojiushixiaobai/jms_guacamole 1.5.6 af71674d07a4 7 days ago 678 MB
dockerhub.azk8s.cn/wojiushixiaobai/jms_koko 1.5.6 2561f1397767 7 days ago 367 MB
(py3) [root@localhost jumpserver]#

11、安装WEB Terminal
(py3) [root@localhost jumpserver]# cd /opt
(py3) [root@localhost opt]# wget https://github.com/jumpserver/luna/releases/download/1.5.6/luna.tar.gz
(py3) [root@localhost opt]#
(py3) [root@localhost opt]# tar xf luna.tar.gz
(py3) [root@localhost opt]#
(py3) [root@localhost opt]# ls
jumpserver luna luna.tar.gz py3
(py3) [root@localhost opt]#
(py3) [root@localhost opt]# chown -R root:root luna
(py3) [root@localhost opt]#

12、配置并运行Nginx
通过NGINX来整合之前安装的各种组件,确保统一访问路径,操作如下:
(py3) [root@localhost opt]# rm -rf /etc/nginx/conf.d/default.conf
(py3) [root@localhost opt]#
(py3) [root@localhost opt]# vi /etc/nginx/conf.d/jumpserver.conf
添加如下内容:
server {
listen 80;
# server_name _;
client_max_body_size 100m; # 录像及文件上传大小限制
location /luna/ {
try_files $uri / /index.html;
alias /opt/luna/; # luna 路径, 如果修改安装目录, 此处需要修改
}
location /media/ {
add_header Content-Encoding gzip;
root /opt/jumpserver/data/; # 录像位置, 如果修改安装目录, 此处需要修改
}
location /static/ {
root /opt/jumpserver/data/; # 静态资源, 如果修改安装目录, 此处需要修改
}
location /koko/ {
proxy_pass http://localhost:5000;
proxy_buffering off;
proxy_http_version 1.1;
proxy_set_header Upgrade $http_upgrade;
proxy_set_header Connection “upgrade”;
proxy_set_header X-Real-IP $remote_addr;
proxy_set_header Host $host;
proxy_set_header X-Forwarded-For $proxy_add_x_forwarded_for;
access_log off;
}
location /guacamole/ {
proxy_pass http://localhost:8081/;
proxy_buffering off;
proxy_http_version 1.1;
proxy_set_header Upgrade $http_upgrade;
proxy_set_header Connection $http_connection;
proxy_set_header X-Real-IP $remote_addr;
proxy_set_header Host $host;
proxy_set_header X-Forwarded-For $proxy_add_x_forwarded_for;
access_log off;
}
location /ws/ {
proxy_pass http://localhost:8070;
proxy_http_version 1.1;
proxy_buffering off;
proxy_set_header Upgrade $http_upgrade;
proxy_set_header Connection “upgrade”;
proxy_set_header X-Real-IP $remote_addr;
proxy_set_header Host $host;
proxy_set_header X-Forwarded-For $proxy_add_x_forwarded_for;
access_log off;
}
location / {
proxy_pass http://localhost:8080;
proxy_set_header X-Real-IP $remote_addr;
proxy_set_header Host $host;
proxy_set_header X-Forwarded-For $proxy_add_x_forwarded_for;
access_log off;
}
}
完成后开始运行Nginx,先运行nginx -t查看,确保配置没有问题:
(py3) [root@localhost opt]# nginx -t
nginx: the configuration file /etc/nginx/nginx.conf syntax is ok
nginx: configuration file /etc/nginx/nginx.conf test is successful
(py3) [root@localhost opt]#
(py3) [root@localhost opt]#

没问题后运行nginx:
(py3) [root@localhost opt]# systemctl start nginx
(py3) [root@localhost opt]#
(py3) [root@localhost opt]# systemctl status nginx
鈼[0m nginx.service – nginx – high performance web server
Loaded: loaded (/usr/lib/systemd/system/nginx.service; enabled; vendor preset: disable>
Active: active (running) since Sun 2020-02-09 10:36:28 CST; 6s ago
Docs: http://nginx.org/en/docs/
Process: 3559 ExecStart=/usr/sbin/nginx -c /etc/nginx/nginx.conf (code=exited, status=0>
Main PID: 3560 (nginx)
Tasks: 2 (limit: 26213)
Memory: 2.3M
CGroup: /system.slice/nginx.service
鈹溾攢3560 nginx: master process /usr/sbin/nginx -c /etc/nginx/nginx.conf
鈹斺攢3561 nginx: worker process
Feb 09 10:36:28 localhost.localdomain systemd[1]: Starting nginx – high performance web s>
Feb 09 10:36:28 localhost.localdomain systemd[1]: Started nginx – high performance web se>
(py3) [root@localhost opt]#
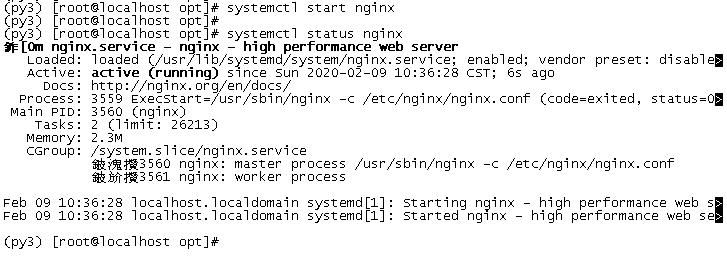
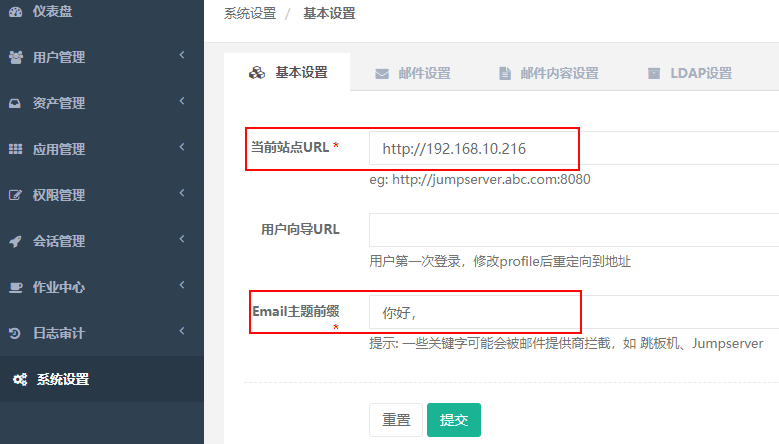
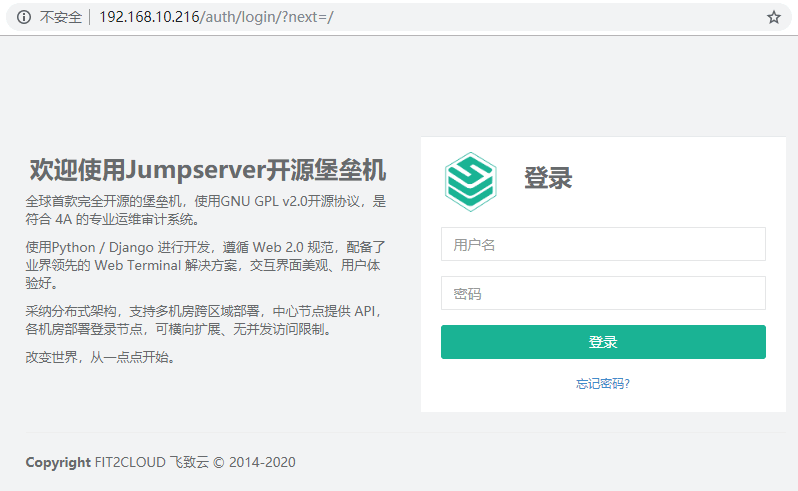
完成后,打开浏览器,输入http://192.168.10.216,出现登陆界面,用户名密码默认都为admin,如下图,


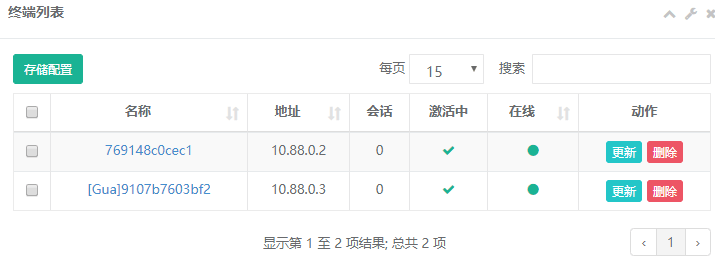
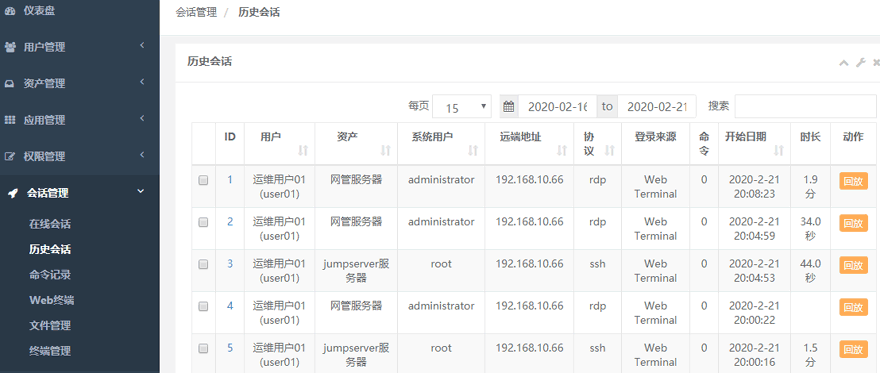
进入后,打开“会话管理”->“终端管理”,由于装了KOKO和guacamole,故正常情况下会有两个终端设备,如下,若没有出现,则koko和guacamole可能安装没成功,如下图所示。
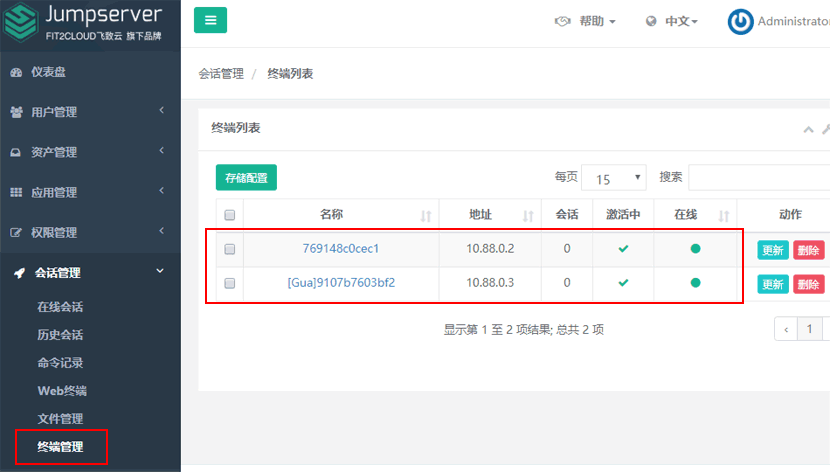
至此,jumpserver在centos8上的部署已完成 ,下步就需要添加用户和设备资源,使jumpserver可以远程管理相应设备或系统。
参考文章:
1、CentOS 8 安装文档
https://jumpserver.readthedocs.io/zh/master/setup_by_centos8.html
2、Docker 使用说明
https://jumpserver.readthedocs.io/zh/master/faq_docker.html
3、pip install -r /opt/jumpserver/requirements/requirements.txt 安装python-gssapi-0.6.4报错
https://blog.csdn.net/a13568hki/article/details/103259532
4、Jumpserver单机快速部署前的准备工作及部署流程

