Zabbix 4.4试用(一):在Centos7上通过Docker方式安装Zabbix 4.4
之前采用一步步安装方式完成了zabbix4.0.2的安装,最近有4.4新版本,且想通过Docker方式安装,操作步骤简洁好多,准备一试。
首先在VMware vSphere平台上完成Centos7.5.1804虚拟机的安装,配置IP地址。然后完成如下步骤的安装:
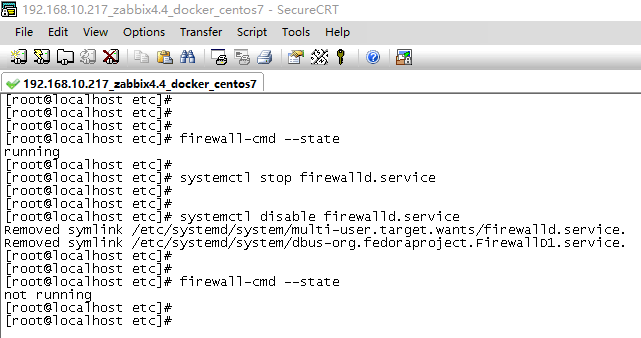
1、关闭并禁用防火墙
[root@localhost etc]# firewall-cmd –state
running
[root@localhost etc]#
[root@localhost etc]# systemctl stop firewalld.service
[root@localhost etc]#
[root@localhost etc]#
[root@localhost etc]# systemctl disable firewalld.service
Removed symlink /etc/systemd/system/multi-user.target.wants/firewalld.service.
Removed symlink /etc/systemd/system/dbus-org.fedoraproject.FirewallD1.service.
[root@localhost etc]#
[root@localhost etc]#
[root@localhost etc]# firewall-cmd –state
not running
[root@localhost etc]#

2、关闭SELINUX
将配置文件/etc/selinux/config的SELINUX设置为disabled,操作如下:
[root@localhost etc]# sed -i ‘s#SELINUX=enforcing#SELINUX=disabled#g’ /etc/selinux/config
[root@localhost etc]#
[root@localhost etc]#
[root@localhost etc]# grep "SELINUX=disabled" /etc/selinux/config
SELINUX=disabled
[root@localhost etc]#

配置完成后reboot重启,再使用getenforce命令查看是否关闭SELINUX:
[root@localhost ~]# getenforce
Disabled
[root@localhost ~]#

3、安装docker
开始安装docker,首先安装docker-ce所需的依赖包:
[root@localhost ~]# yum install -y yum-utils device-mapper-persistent-data lvm2
Loaded plugins: fastestmirror, langpacks
Determining fastest mirrors
* base: mirrors.163.com
* extras: mirrors.aliyun.com
* updates: mirrors.163.com
base

设置docker-ce在线存储库,这里设置为阿里云在线存储库,操作如下:
[root@localhost ~]# yum-config-manager –add-repo http://mirrors.aliyun.com/docker-ce/linux/centos/docker-ce.repo
Loaded plugins: fastestmirror, langpacks
adding repo from: http://mirrors.aliyun.com/docker-ce/linux/centos/docker-ce.repo
grabbing file http://mirrors.aliyun.com/docker-ce/linux/centos/docker-ce.repo to /etc/yum.repos.d/docker-ce.repo
repo saved to /etc/yum.repos.d/docker-ce.repo
[root@localhost ~]#
[root@localhost ~]#

开始安装docker,
[root@localhost ~]# yum clean all
Loaded plugins: fastestmirror, langpacks
Cleaning repos: base docker-ce-stable extras updates
Cleaning up everything
Maybe you want: rm -rf /var/cache/yum, to also free up space taken by orphaned data from disabled or removed repos
Cleaning up list of fastest mirrors
[root@localhost ~]#
[root@localhost ~]# yum makecache fast
Loaded plugins: fastestmirror, langpacks
Determining fastest mirrors
* base: mirrors.cn99.com
* extras: mirrors.cn99.com
* updates: mirrors.cn99.com
base
docker-ce-stable
extras
updates
(1/6): docker-ce-stable/x86_64/updateinfo
(2/6): docker-ce-stable/x86_64/primary_db
(3/6): base/7/x86_64/group_gz
(4/6): extras/7/x86_64/primary_db
(5/6): base/7/x86_64/primary_db
(6/6): updates/7/x86_64/primary_db
Metadata Cache Created
[root@localhost ~]#
[root@localhost ~]#yum install -y docker-ce
Loaded plugins: fastestmirror, langpacks
Loading mirror speeds from cached hostfile
* base: mirrors.cn99.com
* extras: mirrors.cn99.com
* updates: mirrors.cn99.com
Resolving Dependencies
–> Running transaction check
—> Package docker-ce.x86_64 3:19.03.8-3.el7 will be installed

启动并开机自启动docker,操作如下:
[root@localhost ~]# systemctl start docker
[root@localhost ~]#
[root@localhost ~]# systemctl enable docker
Created symlink from /etc/systemd/system/multi-user.target.wants/docker.service to /usr/lib/systemd/system/docker.service.
[root@localhost ~]#
[root@localhost ~]#

docker版本号及信息查看:
[root@localhost ~]# docker version
Client: Docker Engine – Community
Version: 19.03.8
API version: 1.40
Go version: go1.12.17
Git commit: afacb8b
Built: Wed Mar 11 01:27:04 2020
OS/Arch: linux/amd64
Experimental: falseServer: Docker Engine – Community
Engine:
Version: 19.03.8
API version: 1.40 (minimum version 1.12)
Go version: go1.12.17
Git commit: afacb8b
Built: Wed Mar 11 01:25:42 2020
OS/Arch: linux/amd64
Experimental: false
containerd:
Version: 1.2.13
GitCommit: 7ad184331fa3e55e52b890ea95e65ba581ae3429
runc:
Version: 1.0.0-rc10
GitCommit: dc9208a3303feef5b3839f4323d9beb36df0a9dd
docker-init:
Version: 0.18.0
GitCommit: fec3683
[root@localhost ~]# docker info
Client:
Debug Mode: falseServer:
Containers: 0
Running: 0
Paused: 0
Stopped: 0
Images: 0
Server Version: 19.03.8
Storage Driver: overlay2
Backing Filesystem: <unknown>
Supports d_type: true
Native Overlay Diff: true
Logging Driver: json-file
Cgroup Driver: cgroupfs
Plugins:
Volume: local
Network: bridge host ipvlan macvlan null overlay
Log: awslogs fluentd gcplogs gelf journald json-file local logentries splunk syslog
Swarm: inactive
Runtimes: runc
Default Runtime: runc
Init Binary: docker-init
containerd version: 7ad184331fa3e55e52b890ea95e65ba581ae3429
runc version: dc9208a3303feef5b3839f4323d9beb36df0a9dd
init version: fec3683
Security Options:
seccomp
Profile: default
Kernel Version: 3.10.0-862.el7.x86_64
Operating System: CentOS Linux 7 (Core)
OSType: linux
Architecture: x86_64
CPUs: 4
Total Memory: 7.639GiB
Name: localhost.localdomain
ID: RFQ5:YIQ2:LDAJ:WVSG:OIWX:KJDP:OFS4:YZOX:OT6V:AIXQ:Y5XT:EC7B
Docker Root Dir: /var/lib/docker
Debug Mode: false
Registry: https://index.docker.io/v1/
Labels:
Experimental: false
Insecure Registries:
127.0.0.0/8
Live Restore Enabled: false
4、安装zabbix
启动一个mysql实例,操作如下:
[root@localhost ~]# docker run –name mysql-server -t -e MYSQL_DATABASE="zabbix" -e MYSQL_USER="zabbix" -e MYSQL_PASSWORD="zabbix" -e MYSQL_ROOT_PASSWORD="zabbix" -d mysql:5.7 –character-set-server=utf8 –collation-server=utf8_bin
Unable to find image ‘mysql:5.7’ locally
5.7: Pulling from library/mysql
c499e6d256d6: Downloading [=> ] 833.9kB/27.09MB
22c4cdf4ea75: Download complete
6ff5091a5a30: Downloading [===================> ] 1.661MB/4.178MB
2fd3d1af9403: Download complete
0d9d26127d1d: Download complete
54a67d4e7579: Downloading [=========> ] 2.603MB/13.44MB
fe989230d866: Waiting
466a91a95e2f: Waiting
3e4554c238f1: Waiting
603b48ead88c: Waiting

[root@localhost ~]# docker ps
CONTAINER ID IMAGE COMMAND CREATED STATUS PORTS NAMES
e7f3382c954d mysql:5.7 "docker-entrypoint.s鈥 About a minute ago Up About a minute 3306/tcp, 33060/tcp mysql-server
[root@localhost ~]#
完成后启动ZABBIX JAVA GATEWAY实例,操作如下:
[root@localhost ~]# docker run –name zabbix-java-gateway -t –restart unless-stopped -d zabbix/zabbix-java-gateway:latest
Unable to find image ‘zabbix/zabbix-java-gateway:latest’ locally
latest: Pulling from zabbix/zabbix-java-gateway
aad63a933944: Pull complete
d3ba7323f78e: Pull complete
116fee55b2cb: Pull complete
008031baaa1a: Pull complete
759297fddc58: Pull complete
bdc3c870522b: Pull complete
Digest: sha256:d71da91fc4bb197070724cb2937ebb6548dee73de9df9e7747db895f488c2174
Status: Downloaded newer image for zabbix/zabbix-java-gateway:latest
b6dd2a948eb1076da5ddeacf322f06099aad653987ee344cbc79c0869eee780d
[root@localhost ~]#

完成后开始启动zabbix server实例,并关联这个实例到刚才已创建的MYSQL服务器实例,操作如下:
[root@localhost ~]# docker run –name zabbix-server-mysql -t -e DB_SERVER_HOST="mysql-server" -e MYSQL_DATABASE="zabbix" -e MYSQL_USER="zabbix" -e MYSQL_PASSWORD="zabbix" -e MYSQL_ROOT_PASSWORD="zabbix" –link mysql-server:mysql -p 10051:10051 -d zabbix/zabbix-server-mysql:latest
Unable to find image ‘zabbix/zabbix-server-mysql:latest’ locally
latest: Pulling from zabbix/zabbix-server-mysql
aad63a933944: Already exists
dc473403998d: Pull complete
3f3f207b0d86: Pull complete
4278aa9ace68: Pull complete
Digest: sha256:8bc24ef87310170a581f5b5881e36e6464062d17f2f2b30e6520281d07e8366f
Status: Downloaded newer image for zabbix/zabbix-server-mysql:latest
c9c0e158a93f541c5a50ae92cd1c5ff82cda5043813fa74d1938e0fe9b5d76de
[root@localhost ~]#

最后启动ZABBIX WEB接口,并将它与MYSQL服务器实例和ZABBIX SERVER实例关联,操作如下:
[root@localhost ~]# docker run –name zabbix-web-nginx-mysql -t -e DB_SERVER_HOST="mysql-server" -e MYSQL_DATABASE="zabbix" -e MYSQL_USER="zabbix" -e MYSQL_PASSWORD="zabbix" -e MYSQL_ROOT_PASSWORD="zabbix" –link mysql-server:mysql –link zabbix-server-mysql:zabbix-server -p 8080:80 -d zabbix/zabbix-web-nginx-mysql:latest
Unable to find image ‘zabbix/zabbix-web-nginx-mysql:latest’ locally
latest: Pulling from zabbix/zabbix-web-nginx-mysql
aad63a933944: Already exists
f4eabf890618: Pull complete
39f7583adc90: Pull complete
7776e04aff55: Pull complete
fb275d4b4f50: Pull complete
2614dbe8b3f3: Pull complete
8d65f383f456: Pull complete
1b9047914505: Pull complete
be585e988008: Pull complete
ad312041223c: Pull complete
94362bde1339: Pull complete
Digest: sha256:0685485848ce4f759b207f888c4870f936072e4bcf8e5934c3cad62fa5ea4410
Status: Downloaded newer image for zabbix/zabbix-web-nginx-mysql:latest
48a2c96acc9c22ca77dc487a410863487234ad17afe26dafd8c4843b0cf5c46e
[root@localhost ~]#

查看状态:
[root@localhost ~]# docker ps -a
CONTAINER ID IMAGE COMMAND CREATED STATUS PORTS NAMES
48a2c96acc9c zabbix/zabbix-web-nginx-mysql:latest "docker-entrypoint.sh" About a minute ago Up About a minute 443/tcp, 0.0.0.0:8080->80/tcp zabbix-web-nginx-mysql
c9c0e158a93f zabbix/zabbix-server-mysql:latest "/sbin/tini — /usr/鈥 6 minutes ago Up 6 minutes 0.0.0.0:10051->10051/tcp zabbix-server-mysql
b6dd2a948eb1 zabbix/zabbix-java-gateway:latest "docker-entrypoint.s鈥 10 minutes ago Up 10 minutes 10052/tcp zabbix-java-gateway
e7f3382c954d mysql:5.7 "docker-entrypoint.s鈥 15 minutes ago Up 15 minutes 3306/tcp, 33060/tcp mysql-server
[root@localhost ~]#
[root@localhost ~]#
[root@localhost ~]# docker images
REPOSITORY TAG IMAGE ID CREATED SIZE
zabbix/zabbix-java-gateway latest 660ab57f1078 6 days ago 82MB
zabbix/zabbix-web-nginx-mysql latest 2cc114aa7b9c 6 days ago 167MB
zabbix/zabbix-server-mysql latest 2bb0dd73957d 6 days ago 64.7MB
mysql 5.7 413be204e9c3 2 weeks ago 456MB
[root@localhost ~]#

至此,DOCKER方式安装ZABBIX已经安装,输入网址http://IP:8080,即可打开ZABBIX,用户名Admin,密码zabbix,如下:


感觉这时候缺一个docker-compose
1.为在CentOS 8呢?
2.DNf 是否更好呢?
最近在安装ZABBIX,不知道这个效果和收费的PTRG比起来如何。当然不考虑费用。只算性能和扩展。
老铁,5.0LTS也出了哈哈